This guide is written for anyone who currently hosts a WordPress website and wants to move to RunCloud without risking any downtime. RunCloud works with most cloud hosts (like Linode, Vultr, UpCloud, AWS, Google Cloud), but I’m going to use it with DigitalOcean for the purposes of this tutorial.
This whole guide can be followed for free using RunCloud’s free account and DigitalOcean’s free $100 credit offer. It’s great for testing out the speed and settings of your new cloud hosting setup without wasting any money.
I’m going to make it as simple as I can for you to follow along and switch your hosting over. The whole process takes less than 20 minutes, and you won’t need any premium plugins or tools. And no Linux command line coding required!
This process will work the same way whether you’re moving from shared hosting like BlueHost or Hostgator, managed hosting like Kinsta or WPEngine, or another cloud hosting provider like Cloudways or ServerPilot.
Let’s get into it.
Table of Contents
What is RunCloud?
RunCloud is a lightweight cloud hosting control panel. You can use RunCloud to deploy and manage cloud servers from a range of providers (like DigitalOcean, Vultr and UpCloud).
It’s a great tool to help you leverage the benefits of cloud hosting without the hassle of Linux command line stuff.
If you’re not sure if RunCloud is the best cloud hosting service for your website, you can learn more about how RunCloud differs from Cloudways in my comparison guide, where I talk in more detail about its features.
What does RunCloud do?
- Connects to DigitalOcean, Linode, UpCloud and Vultr via API
- Connects to most cloud hosting servers
- 1-click WordPress installation
- Control panel to perform server tasks (like automatic backups and website staging)
- Speed- and security-optimized server management
Reasons to switch to RunCloud
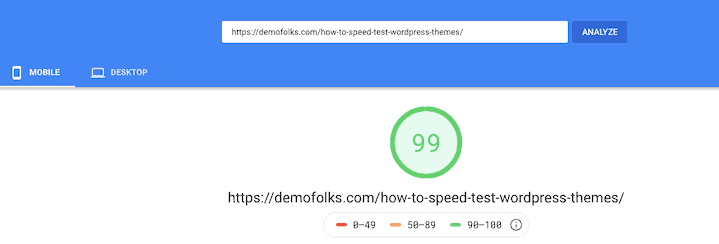
Cloud hosting is lightning fast. Even tiny servers with 1GB RAM can outperform shared hosting every day of the week. And, as you’re probably aware, WordPress has a reputation for being slow. Website speed is super important for SEO and UX, so cloud hosting is the perfect solution if your WordPress website isn’t loading quickly enough.
While I also like using managed cloud hosting platform Cloudways for its $10/month entry-level plan, RunCloud is a much more affordable solution, because you don’t pay any markup on servers. If you want to learn more, here are the differences between RunCloud and Cloudways hosting.
Unlike ServerPilot, another popular cloud control panel, RunCloud doesn’t charge per application. This means you can use RunCloud to host multiple applications (e.g. WordPress websites) on a single server for no extra cost.
RunCloud has 4 pricing plans, free, basic, pro and business.
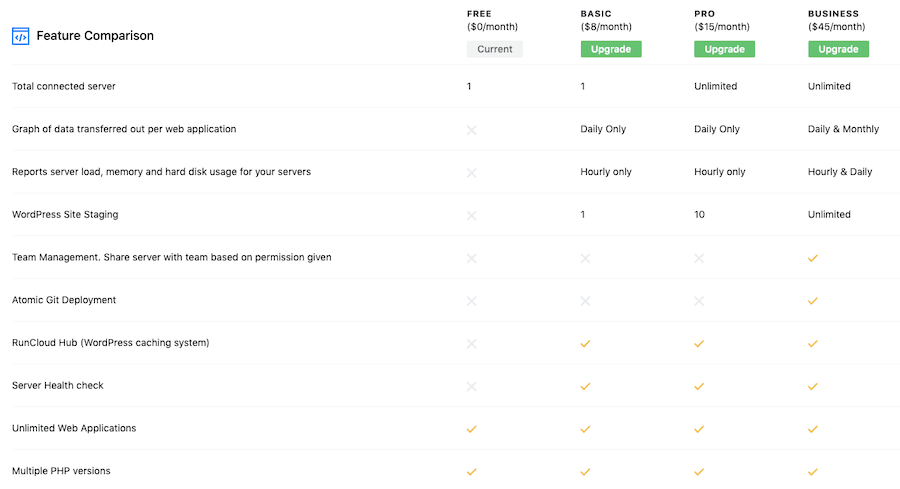
In this tutorial, I’m going to use the free RunCloud account, so you can see exactly what you can achieve without spending any money. You’ll also get a 5-day free trial when you sign up, so you can test out everything RunCloud can do.
How to migrate any WordPress website to RunCloud with no downtime
Step 1: Sign up for RunCloud
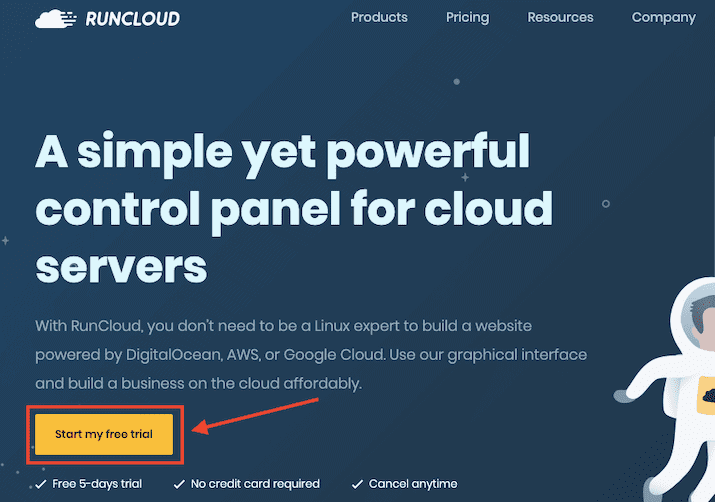
The first step is to sign up for RunCloud. You will get a 5-day free trial (no credit card required), but you can remain on the free plan indefinitely (they don’t make that clear when signing up!).
Create a username and password, or log in with your GitHub, Google or DigitalOcean account if you have one (or plan to make one in Step 2 below).
Confirm your account by clicking the link in the email RunCloud will send you and login again.
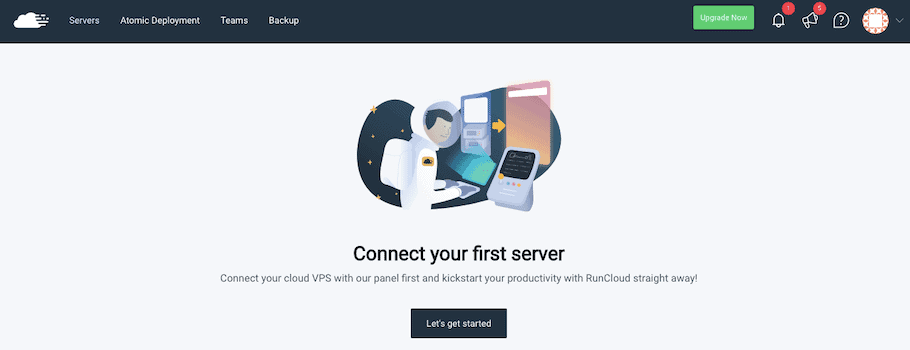
Your RunCloud dashboard will look like this when you first join:
Step 2: Sign up for the cloud hosting platform of your choice
RunCloud is only a control panel service, so you’ll need to pick a cloud hosting provider to integrate with it.
I personally like DigitalOcean, and have been happy with them over the last 7 years or so. I’m also using UpCloud, which gets a good VPS Benchmark score for its 1GB $5/month server plan.
RunCloud will work with most cloud providers, but it integrates via API with DigitalOcean, Linode and Vultr.
RunCloud also has easy integration with UpCloud, Google Cloud, AWS, UpCloud and Azure.
You can usually find a free credit offer for most cloud hosts; here are some I recommend:
- DigitalOcean $100 bonus credit (expires after 60 days)
- UpCloud $25 bonus credit
To keep things simple, I am going to sign up for a DigitalOcean account for this tutorial.
Sign up for DigitalOcean
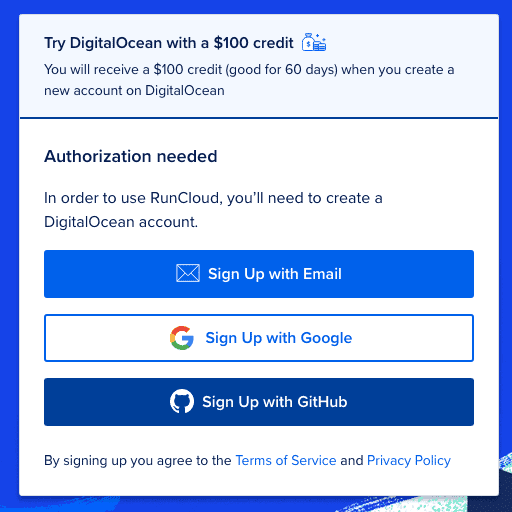
Follow this link for $100 credit, then sign up for DigitalOcean with your name, email and password, or use your Google or GitHub account.
Verify your email address, then add a payment method.
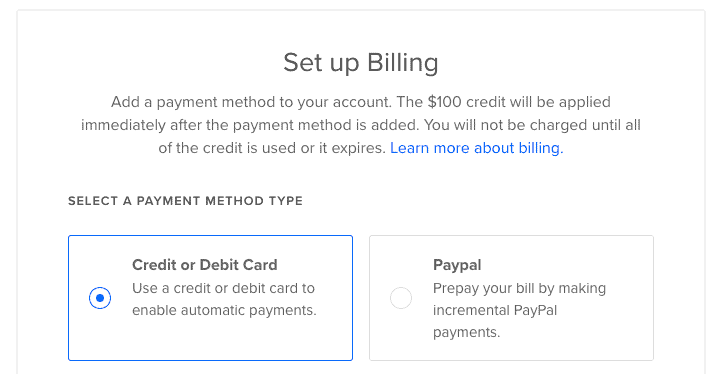
You can choose between credit/debit card or PayPal. No money will be taken from your credit/debit card until the $100 free credit expires. If you prefer PayPal, you will need to top-up your account by $5 to activate it. You’ll get to keep the $5 credit and it won’t expire when the $100 credit does (and I can confirm that DigitalOcean will use your free $100 before it touches the $5 – nice).
Step 3: Generate a DigitalOcean API key
It’s time to connect with the DigitalOcean API so we can control our DO account from RunCloud’s dashboard and add servers without leaving RunCloud (this feature is called Direct Server Provisioning).

From your DigitalOcean dashboard, click the “API” link on the left-hand menu.
If you can’t find it, try using this URL when logged in to your DigitalOcean account:
https://cloud.digitalocean.com/settings/api/tokens
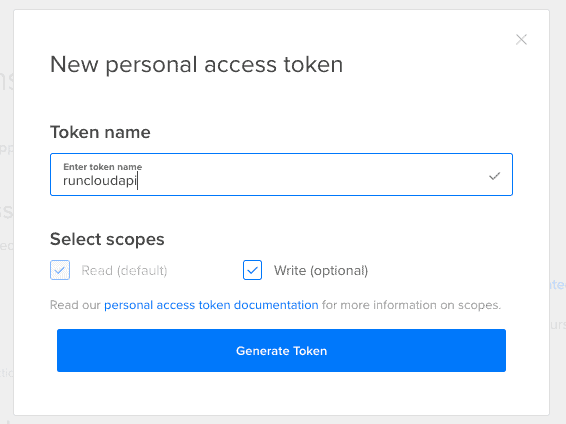
Click the “Generate New Token” button, and add a new API token name (pick something related to RunCloud so you remember what it is for), then hit “Generate Token”.
Copy your API token and paste it in a text pad temporarily as it will not be visible in you DigitalOcean account again. If you lose it before you add it to RunCloud, you’ll have to generate a new one.
Step 4: Connect DigitalOcean and RunCloud by API
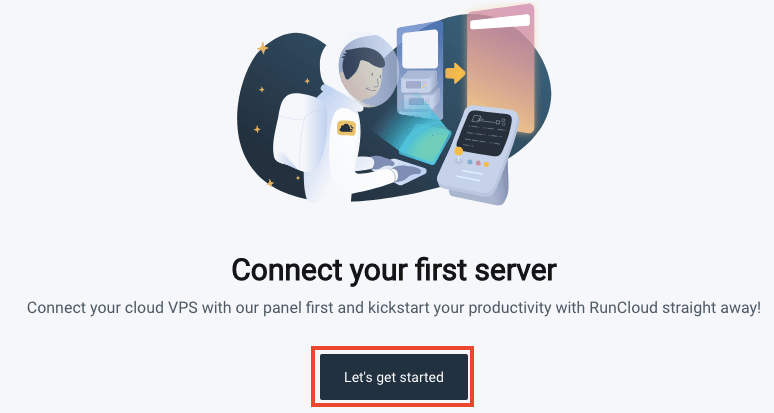
In your RunCloud dashboard, click “Let’s get started” to launch the server setup panel.
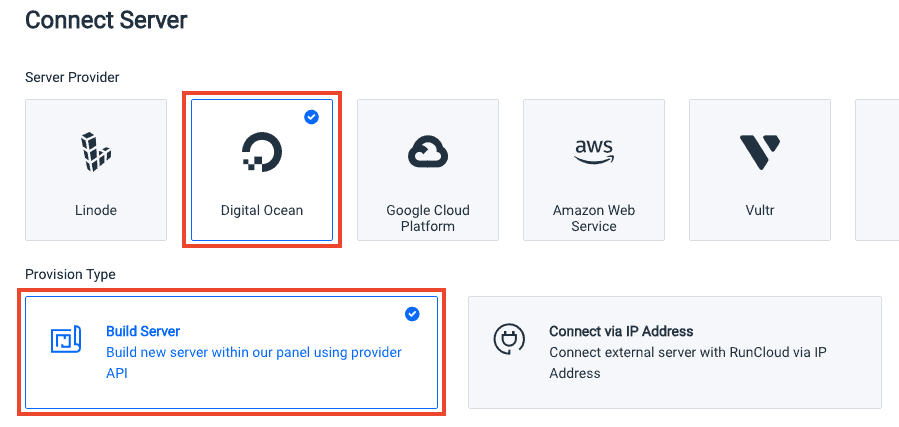
Select “Digital Ocean” as the server provider, and “Build Server” under the provision type. This option will allow us to connect to DigitalOcean via API.
Scroll down and select “Add new key” to add the API key we created in Step 3.
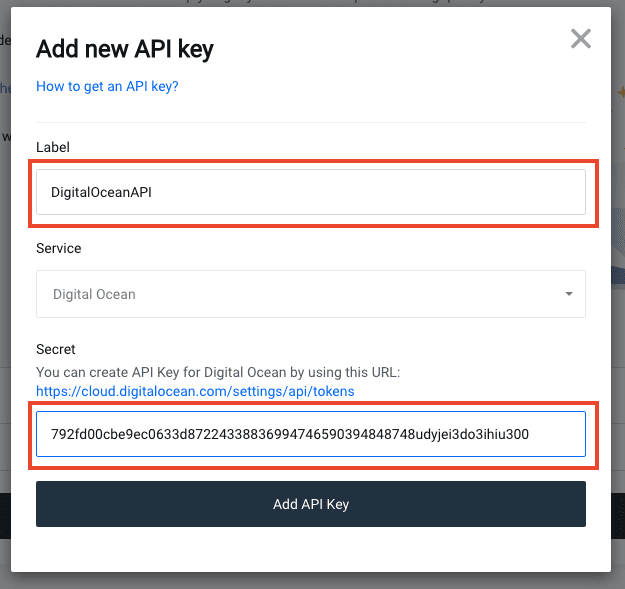
Give the key a descriptive name (can be anything you like) in the “Label” field, paste the API key into the field labeled “Secret”, then hit “Add API Key” to add the key.
Select your new key in the drop-down list, then click “Build server”.
Step 5: Launch a new server
Thanks to the API connection, we can now add new DigitalOcean servers directly from RunCloud.
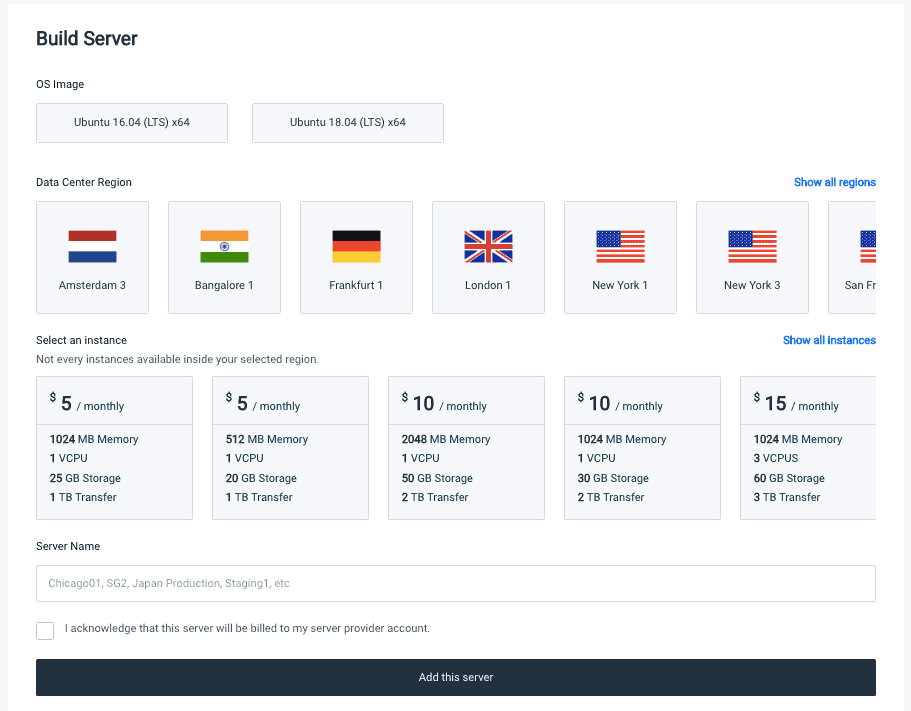
Select the OS Image you prefer – I suggest Ubuntu 18.04 as it’s more recent.
Choose a Data Center Region – this will be the location of your server. Pick a server that’s close to the majority of your website visitors (check Google Analytics if you don’t know which countries your visitors come from).
Select an instance – this is the DigitalOcean plan you’ll be signing up for. The $5/month plan (with 1024MB memory aka 1GB) is great for hosting WordPress websites, and I’ve found it to be very fast and secure. If you have a high-traffic website or lots of memory-heavy functions, you can go for something larger.
Add a Server Name – anything descriptive is fine, then click “Add this server”.
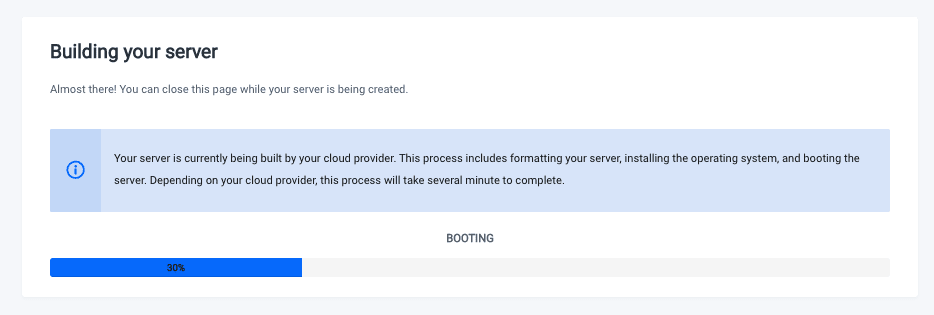
It will only take a minute or so for the server to be set up.

The server will then be configured by RunCloud. This will take up to 15 minutes, so be patient.
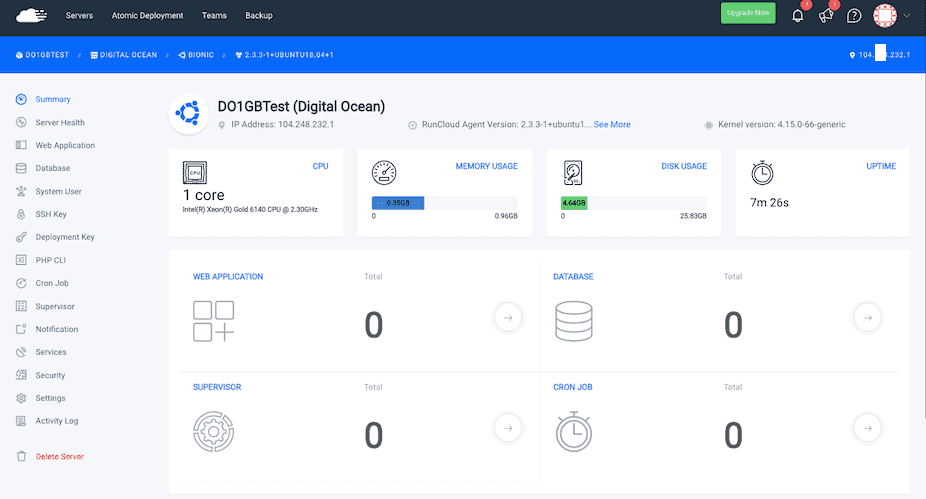
You’ll be shown the server dashboard when it’s all set up:
Step 5: Install WordPress

In the left-hand menu bar, click “Web Application”, then hit the “Create Web App” button.
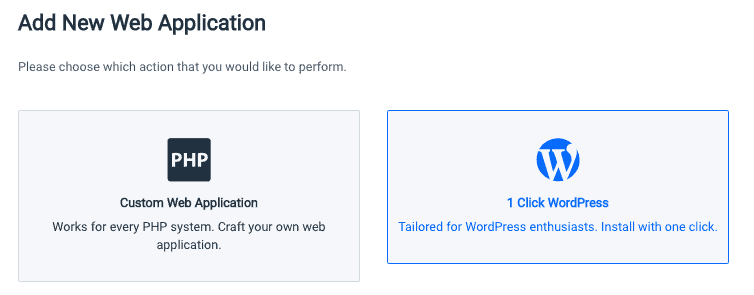
Select the “1 Click WordPress” option.
Now we have some settings to configure.
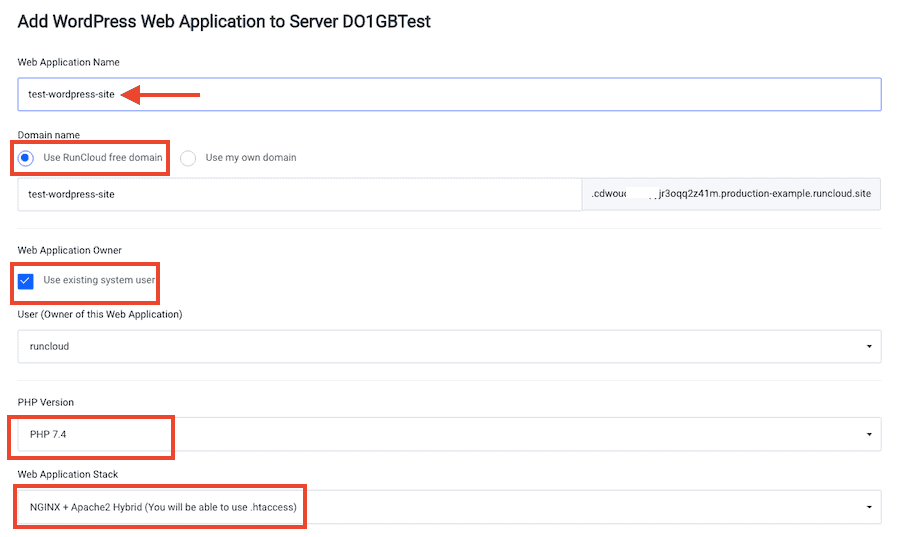
Give your application a descriptive name.
In the Domain name field, select “Use RunCloud free domain“. This will let you view, configure and test a live version of your WordPress website on a temporary domain (e.g. 12345test.runcloud.site). When you’re ready to switch your domain name, you can make the move with no downtime.
If you prefer to use your own domain, I recommend using a subdomain, like new.mywebsite.com, you can test everything out before making the switch with no downtime. You will need to map the subdomain to the new WordPress app by adding a DNS record to do this (see Step 9).
You can also access the website by IP address if you set the WordPress web app as the default application and are only putting a single app on the server.
In Web Application Owner, leave “Use existing system owner” checked.
Select the latest PHP version in the drop-down.
For Web Application Stack, you can choose from:
- NGINX + Apache2 Hybrid
- Native NGINX
- Native NGINX + custom config
As RunCloud state, Native NGINX is the fastest option for WordPress, but you won’t be able to use .htaccess. If you need .htaccess or aren’t sure which to pick, select NGINX + Apache 2 Hybrid.
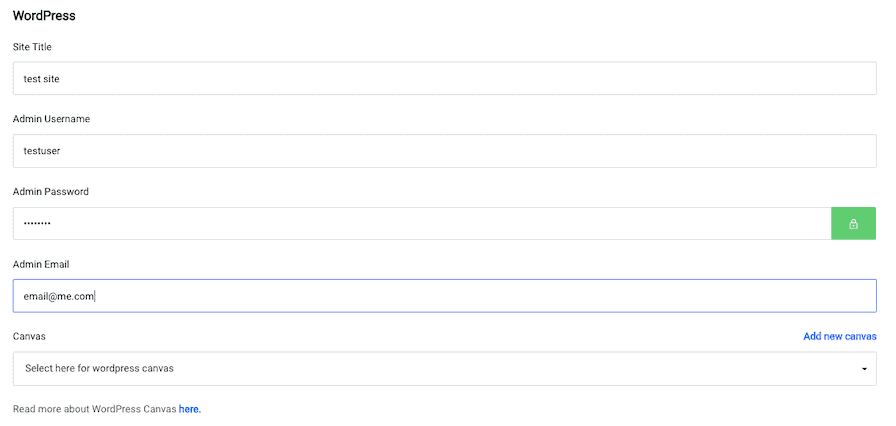
Add your WordPress details:
- Site Title
- Admin Username
- Admin Password
- Admin Email
Don’t worry about using the same details as your existing WordPress site – we’re going to be replacing this new WordPress installation with your old site soon.
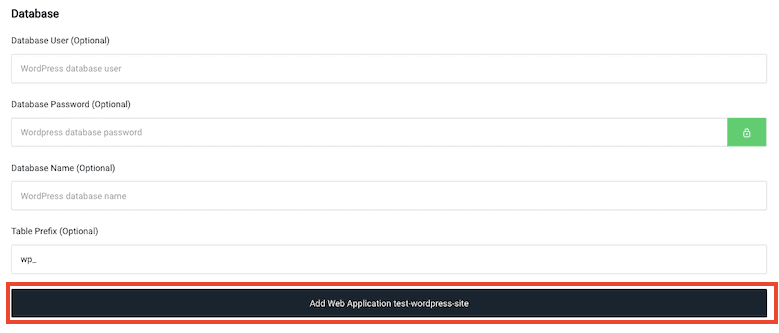
Leave the Database settings blank, then click “Add Web Application”.
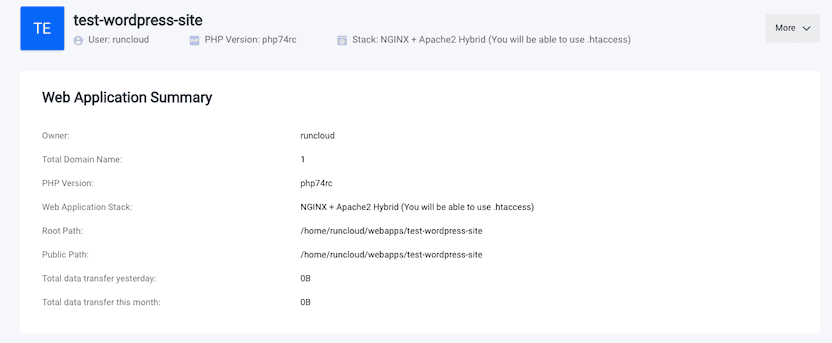
You’ll get a confirmation screen almost instantly:
Step 6: Export your old WordPress website
Next, we’re going to use a plugin to backup your existing WordPress website so it can be imported into the new site.
There are many free and premium backup out there. I trust (and have used many times) the free All-in-One WP Migration plugin, so that’s what I’ll use for this tutorial.
If you prefer to use another method, I also have a tutorial covering how to migrate your website to RunCloud using Migrate Guru, which uses SFTP to move your site over all at once (it’s also a better method for larger or more complex sites).
Login to your WordPress site and install the All-in-One WP Migration plugin.
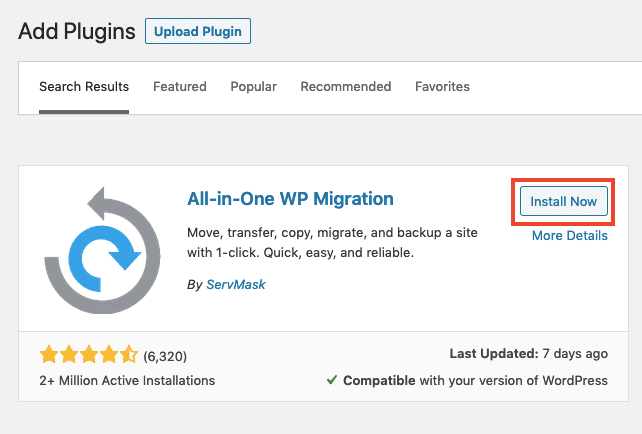
Go to WordPress Dashboard > Plugins > Add New, then search for All-in-One Migration and click “Install Now”, then “Activate”.
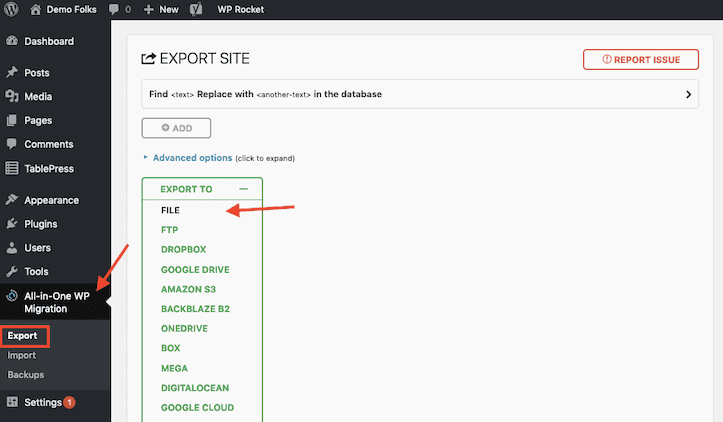
Find the All-in-One Migration label on the left-hand menu, then click “Export” and select “File” in the “Export To” drop-down list.

The plugin will take a few seconds to scan your site, then you’ll see a green button that says “Download yoursite.com”. Click it and save the export file to your computer.
The file name will look something like this:
yourdomain.com-20210612-1234-abcd.wpress
Step 7: Import your WordPress website into your new RunCloud WordPress installation
Now we’re going to log into the new WordPress installation so we can import your exported files to migrate the site.
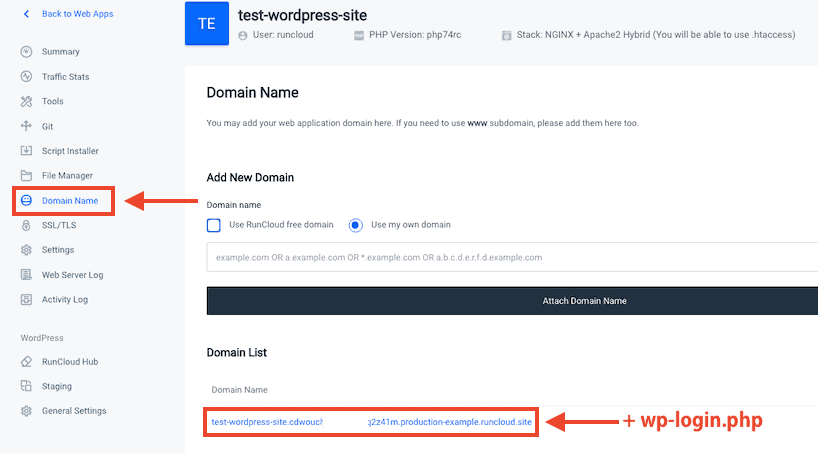
From the Web App view, click “Domain Name” in the left-hand menu bar, and find the long domain name RunCloud generated for you.
If you’re in the server overview panel, you can get to the same information by clicking the “Web Application” label on the left-hand menu.

Click to the temporary domain name that looks something like this:
http://test-wordpress-site.cdwoudjde384hheuu3k34hj2z41m.production-example.runcloud.site/
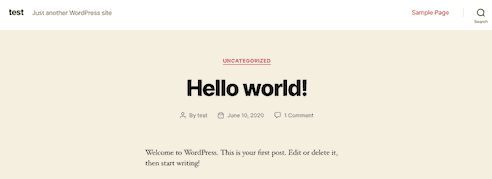
And you’ll see the fresh WordPress installation homepage:
Now add “wp-login.php” to the URL in your browser address bar, like this:
http://test-wordpress-site.cdwoudjde384hheuu3k34hj2z41m.production-example.runcloud.site/wp-login.php
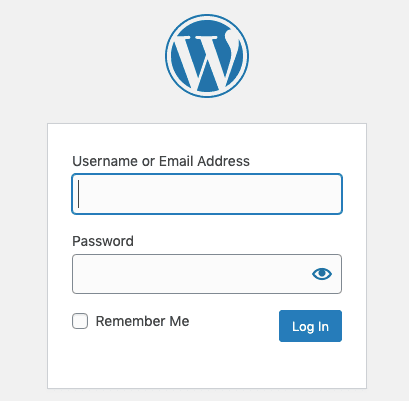
You’ll see the standard WordPress login form. Log in using the username and password you chose in Step 5.
You’re now in the admin panel of a fresh WordPress installation.
Install All-in-one Migration plugin on the new site just like you did in Step 6.
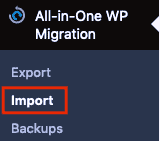
Find the All-in-One Migration label on the left-hand menu, then click “Import” and select “File” in the “Import From” drop-down list.
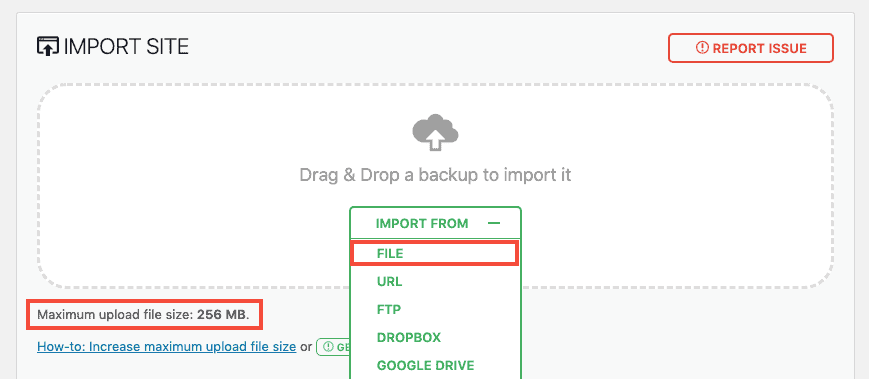
Select the file you exported in Step 6, and wait while it uploads.
Note: If you have a large WordPress website, you’ll need to modify the maximum upload file size by editing the wp-config.php file or .htaccess.
If your WordPress site is more than 512MB in size, the free version of All-in-One WP Migration will not work and you’ll need to upgrade to the premium version.
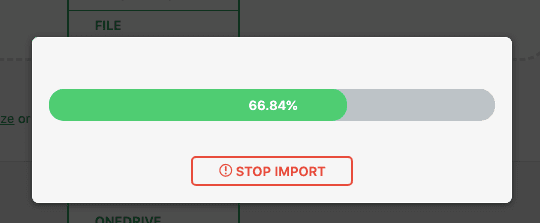
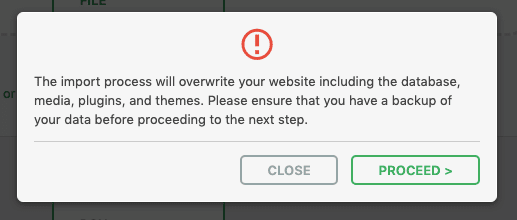
Wait while the .wpress file uploads. You’ll then see a warning message that reminds you that you’re about to copy over the existing WordPress site database and files. Click “Proceed” and wait for it to finish.
When the import is complete, you’ll get a final confirmation notice. It states that permalinks have been set to the default.
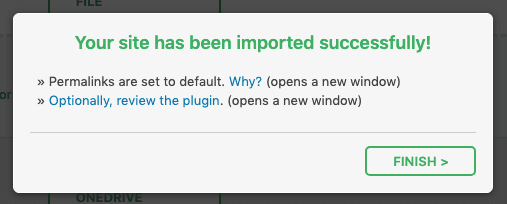
Click “Finish” and check how your new site looks.
If your site is not loading correctly, you can create a Let’s Encrypt SSL certificate so you can test it with SSL (paid accounts on free trial only). You’ll find the SSL menu in RunCloud’s left-hand menu when you select your WordPress application.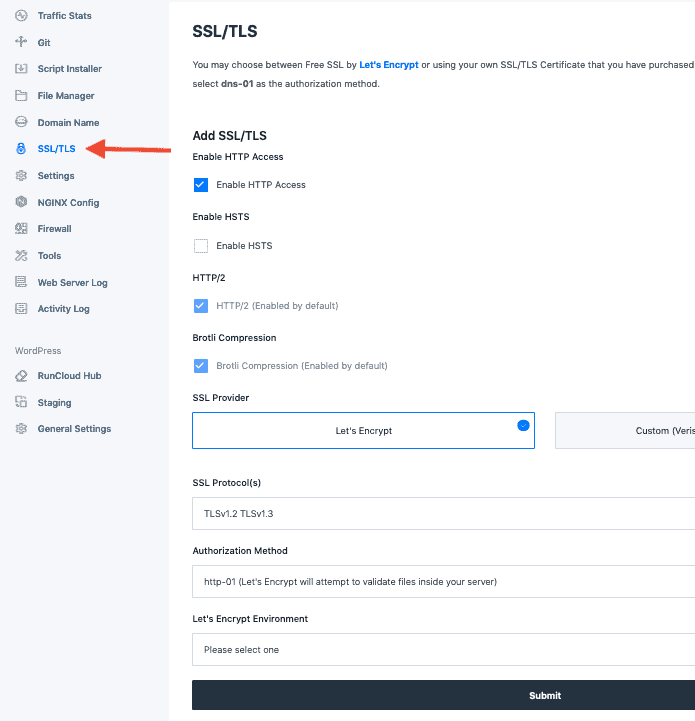
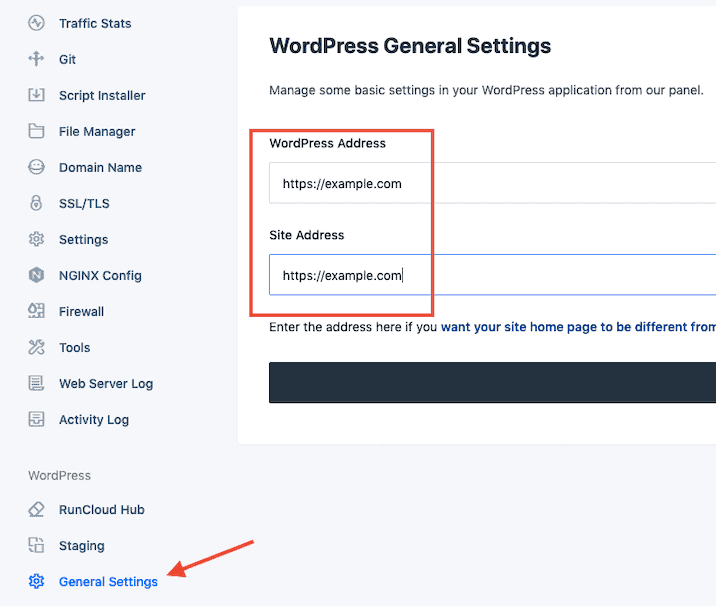
Also make sure that the WordPress site address is correct. In RunCloud, in your application settings, click on “General Settings” in the WordPress section and update your WordPress Address and Site Address as required.
Step 8: Change permalinks and check your site
Your new WordPress site will have the exact same structure and content as the old one, except for permalinks. If you were using a custom permalink structure, you need to change the settings.
First, you’ll have to login to WordPress again, this time using the username/email and password from your old site (the new login details have now been overwritten).
To change the WordPress permalink settings in the main Dashboard, go to Settings > Permalinks and select the same option you use on your old site, then scroll down and click “Save Changes”.

I use the Post name permalink structure, but make sure you change it to whatever you’ve been using. You want to keep the permalinks the same so that you don’t have any broken links or missing pages when you complete the migration.
Now that your new site is a carbon copy of your old one, it’s time to check it through and see if anything is broken.
If your site is small, you can check it manually. If you have a lot of pages, you can make automated checks using software like Screaming Frog or the ahrefs site audit feature. Run a crawl of your existing domain, and the new installation domain and look for differences.
Remember to check the following things are correct on the new site:
- Permalink structure
- Google Analytics code
- Meta titles and descriptions
- Robots.txt
- Plugin licenses
If you’re using a single-site license plugin, you’ll need to switch the license over once the migration is complete.
Another great check to perform at this stage is a WordPress speed test. You can see how much faster your new RunCloud cloud server setup is compared to the old host.
There are many free website speed checkers out there, but I like how quick and easy it is to check site speed across many locations at once with FastorSlow.com.

Compare a page on the new RunCloud hosting setup to the old host and see what speed improvements you can get.
You can also check Google’s PageSpeed Insights tool.
Once you’re satisfied that the new website is error-free, fast and ready to go, it’s time to complete the migration.
Step 9: Change your DNS settings
The only thing left to do is point your domain name (e.g. mywebsite.com) towards your new RunCloud/DigitalOcean server, and away from your old host.
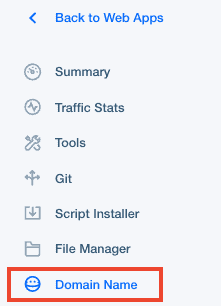
In the RunCloud dashboard, go to your web app, then click on “Domain Name” in the left-hand menu.
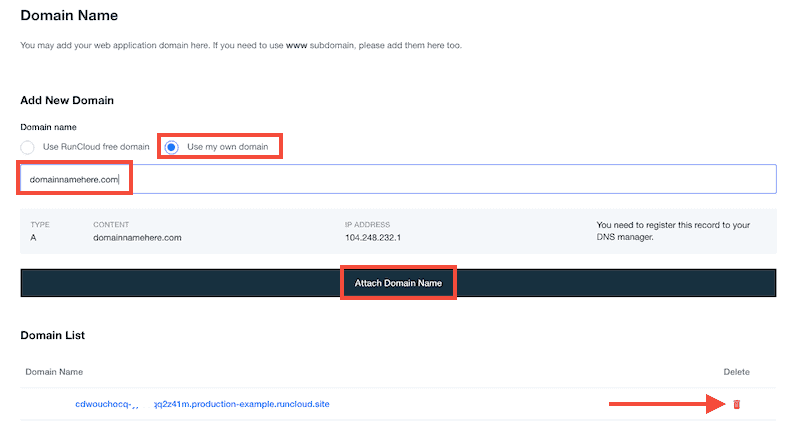
In the “Add New Domain” section, select “Use my own domain” and type/paste your domain name into the blank field, then click “Attach Domain Name”.
Then you can delete the temporary RunCloud domain from your app by clicking the red bin icon.

If you previously added a Let’s Encrypt SSL certificate to a test subdomain (e.g. new.mydomain.com), you will need to redeploy it to avoid redirect loops.
Note: If you are using a non-www domain as your primary domain, make sure you add both the www.domain.com and domain.com to RunCloud, and create an additional CNAME DNS record. This will ensure that your www.domain.com will be correctly redirected and you won’t have any problems with incorrectly indexed pages. 

Creating an A Record
You now need to add the A record to your DNS manager.
The easiest way to do this is to use DigitalOcean’s nameservers.
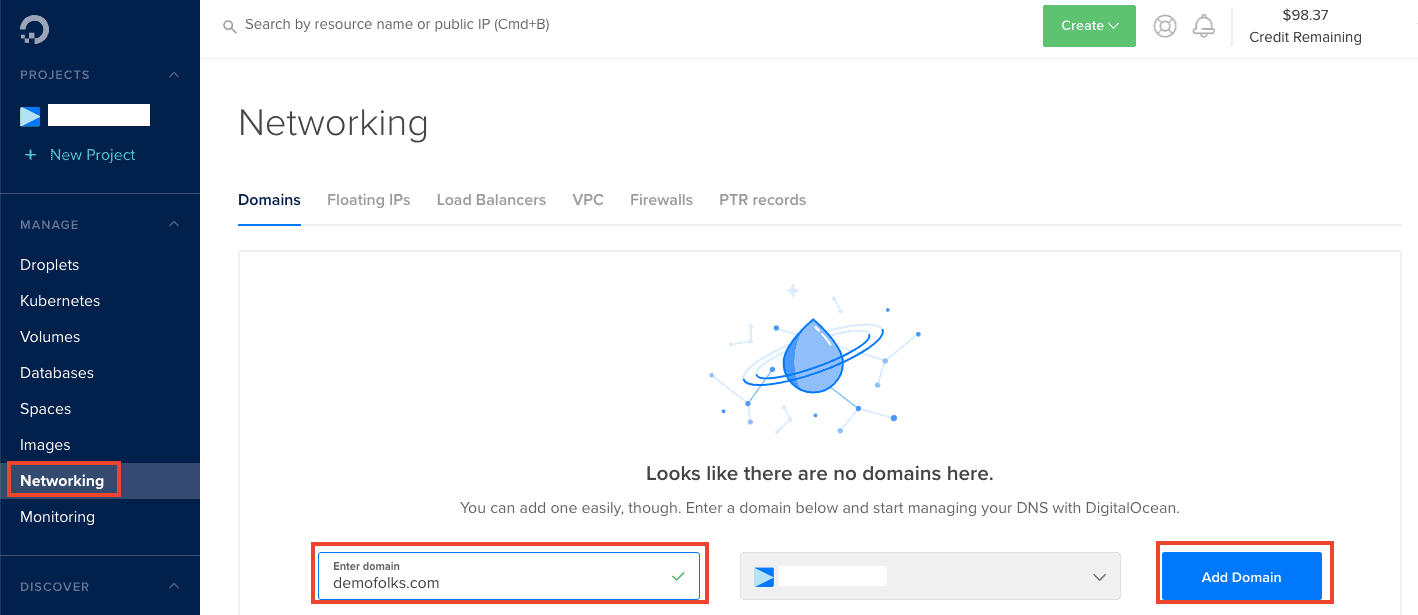
Log in to DigitalOcean, and select “Networking” in the left-hand menu, then enter your domain name and click “Add Domain”.
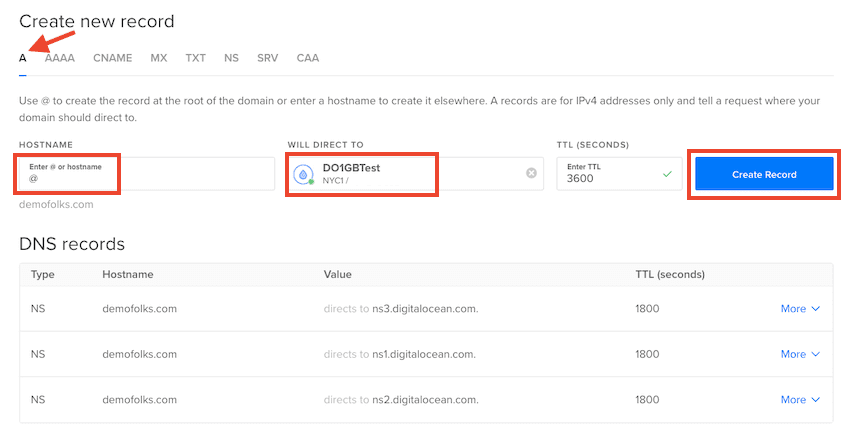
In the DNS record panel, make sure you’re creating an A record, then enter “@” as the hostname (unless you’re wanting to host on a subdomain, in which case, enter the name of your subdomain (e.g. blog).
Select the DigitalOcean server you want to use (if you have more than one, check the IP in RunCloud to make sure you’re choosing the right one) in the “Will Direct To” field.
Click “Create Record”.
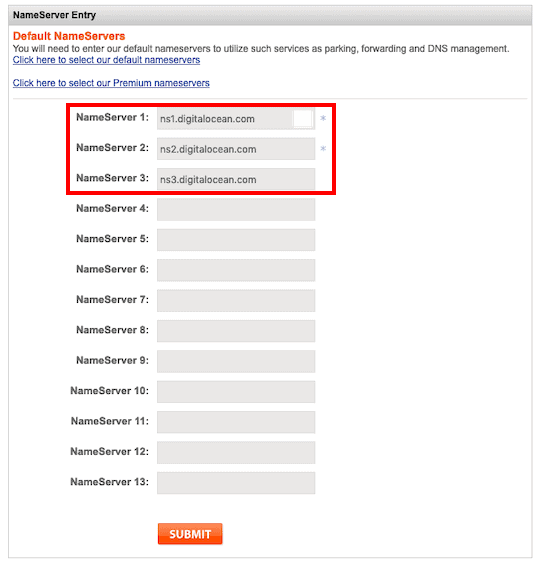
Now you need to change to DigitalOcean’s nameservers at your domain name registrar. Login to your registrar account (the place you bought the domain name from), and change the nameservers.
For example, I use Namesilo, so changing nameservers looks like this:
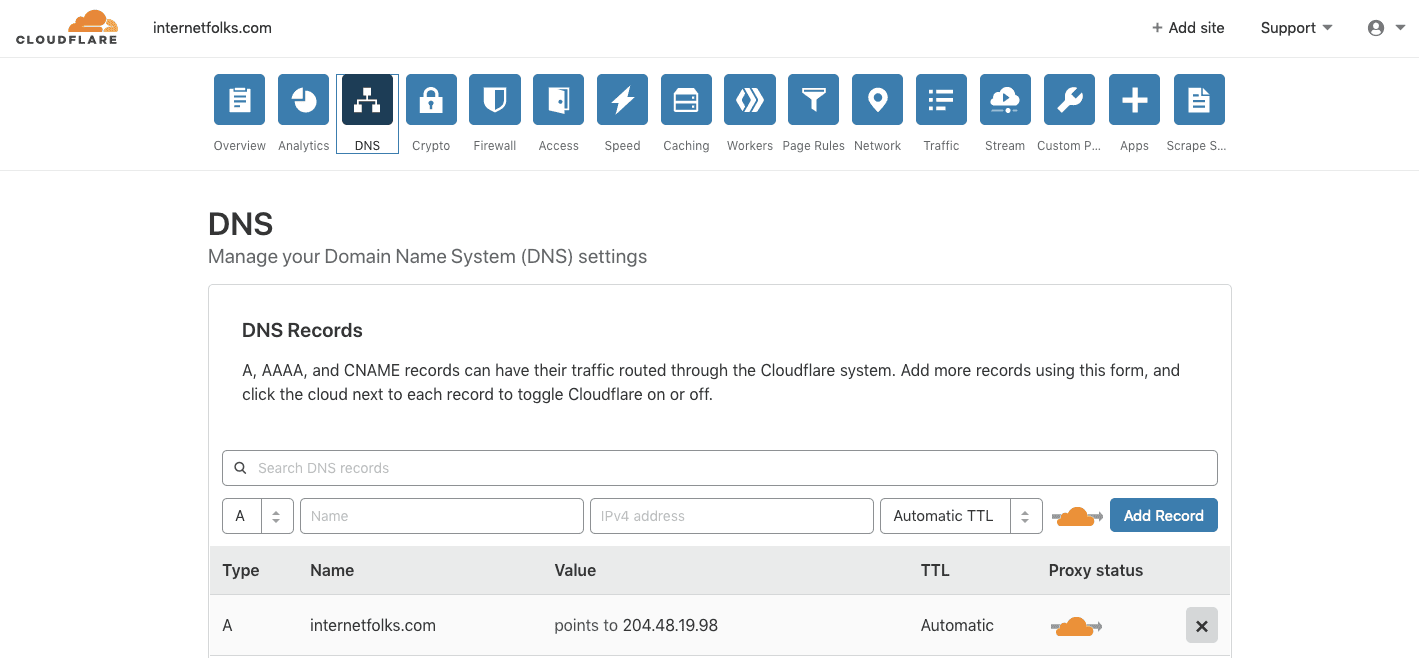
You can also use Cloudflare’s nameservers to manage DNS records instead, as it also helps keep your website fast and secure. It’s free to use and once you’re using Cloudflare’s nameservers, you can change out the IP address in the A record to point to your DigitalOcean server IP.
And that’s it: once your nameservers propagate (could take a few minutes depending on your registrar), your website is now migrated over to DigitalOcean and managed through RunCloud.
Tip: If you get an error message along the lines of: “The page isn’t redirecting properly” and you’re using Cloudflare, make sure you’re using “Full SSL” in Cloudflare. If your site is configured ot use “Flexible SSL”, you may have an issue with an infinite redirect loop.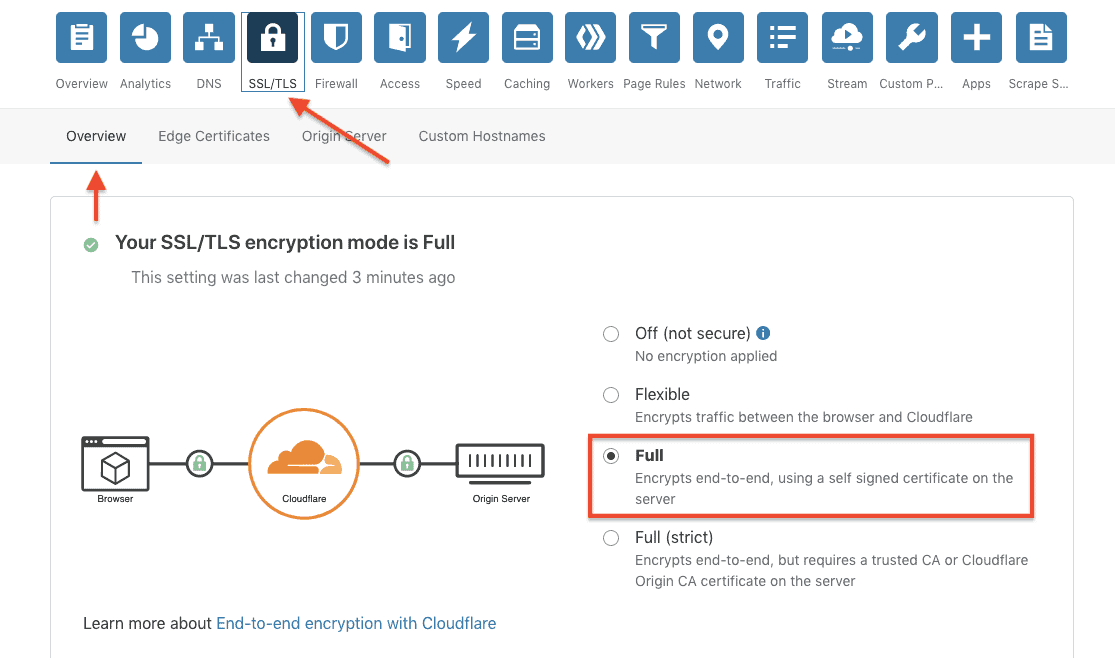
Once you’re happy with your new setup, you can safely cancel your old hosting plan.
Managing your server is done within the RunCloud dashboard. You can schedule backups, monitor server stats and more. If you’re using SSL (and you should be!), then RunCloud will let you install Let’s Encrypt, but only if you’re on a paid plan. You can also use Cloudflare to get a free SSL certificate, which works fine with RunCloud’s free plan.
Enjoy your new cheap and fast WordPress cloud hosting setup!
Here are the load speeds I get on on a demo WordPress post with over 2000 words, 7 images, an embedded YouTube video and table:
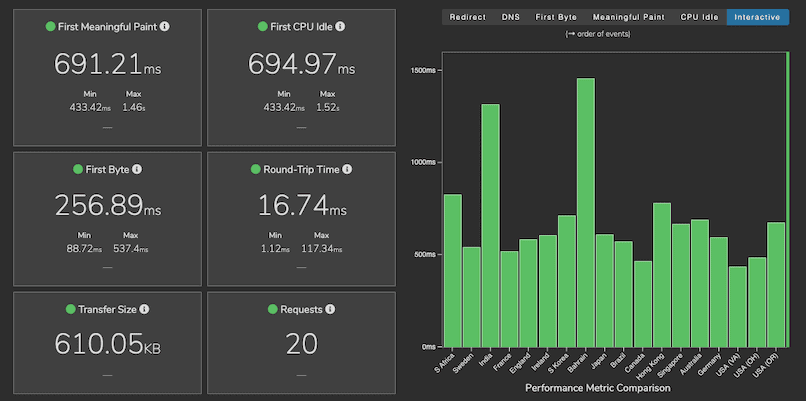
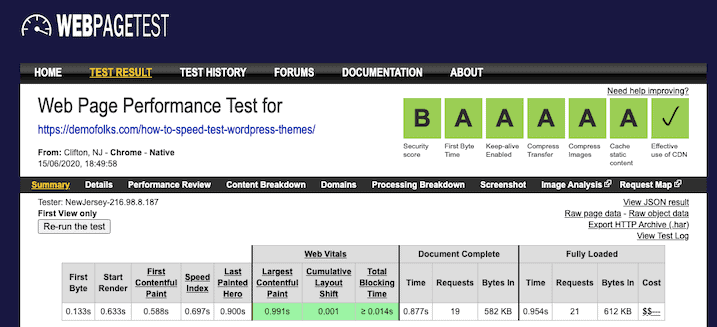

That’s all for $5/month (DigitalOcean 1GB server, using RunCloud’s free plan). Pretty speedy, eh?
For more WordPress speed advice, read our analysis of the fastest WordPress themes.

