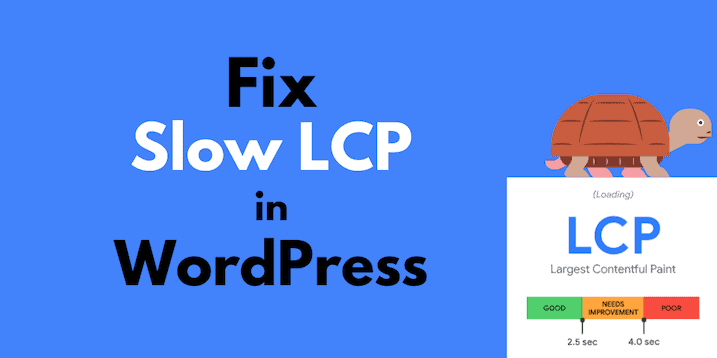
LCP (Largest Contentful Paint) measures how long it takes for a website page to fully load, including elements like images, video thumbnails, forms and paragraph text.
LCP makes up one third of Google’s Core Web Vitals metrics (alongside FID and CLS), which measure website speed.
You need to lower your LCP score for 2 reasons:
- To make your website pages load faster, which improves user experience and helps keep your visitors happy
- To please Google, and maintain search engine rankings and improve SEO
Google is now using LCP and the other Core Web Vitals metrics as a ranking factor: if your website doesn’t pass the test, you’re search engine rankings could suffer.
Here’s how to fix your LCP in 6 steps if you’re using WordPress.
Table of Contents
How to fix your LCP score in 6 steps
Step 1: Check your Core Web Vitals report in Google Search Console (GSC)
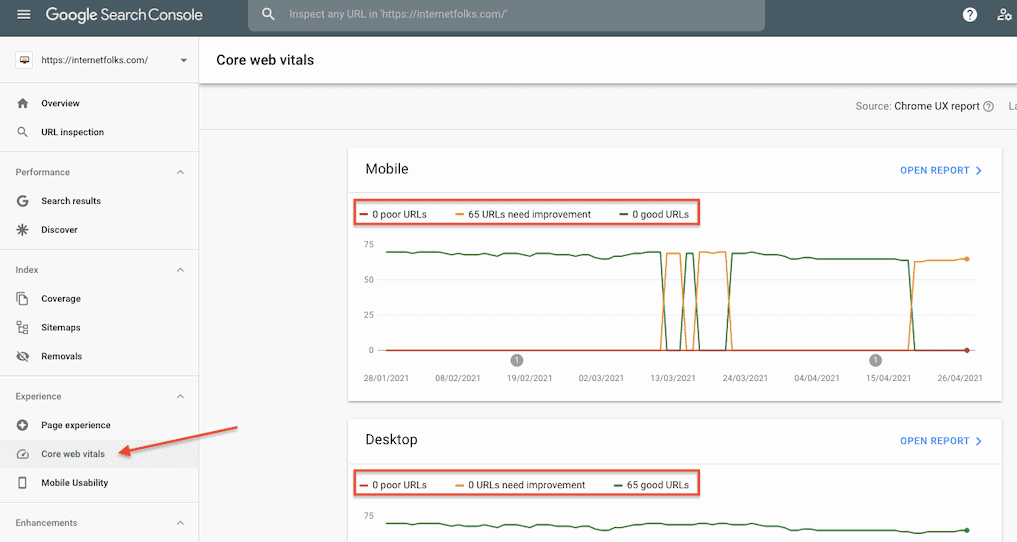
Log into GSC and click the “Core web vitals” link the the left-hand menu.
You’ll see your site’s web vitals reports for mobile and desktop, categorized into 3 groups: “poor”, “needs improvement” and “good”. This data comes from the Chrome UX report, which measures how your website performs for real users on Chrome.
If all your pages are in the “good” category on both desktop and mobile, congratulations! If not, click the mobile or desktop report to learn more (in my example, I have 65 pages that need improvement on mobile).
Step 2: Compile a list of affected URLs
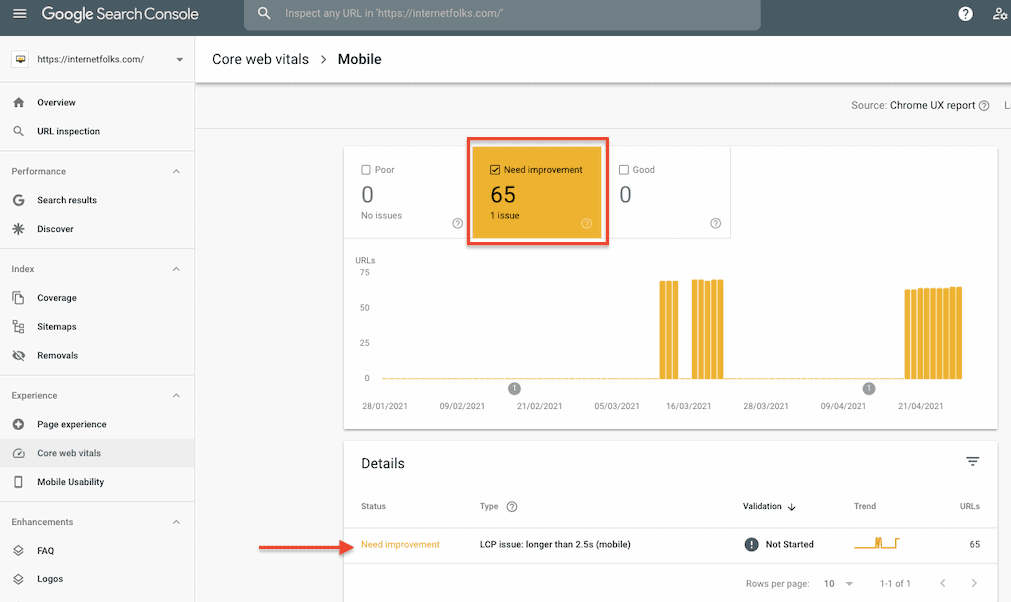
From the mobile or desktop Core web vitals report, select the “needs improvement” and “poor” labels as applicable, and you’ll see what issue your pages have (could be one or more of LCP, FID, CLS). In my case, I have 65 pages with this message:
LCP issue: longer than 2.5s (mobile)
Click the message and you’ll get more details:
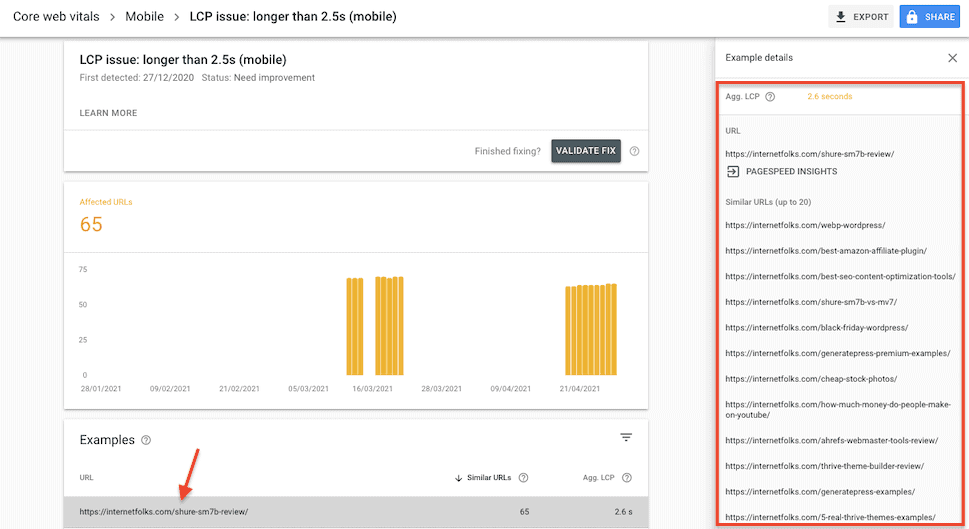
On the next page, you’ll see a section called “Examples”, with a sample page that exhibits the issue, along with your aggregate LCP time (in my case, 2.6 seconds, which is just over the 2.5 required for a “good” score).
Click the URL and you’ll get a list of more URL with the same issues. Annoyingly, GSC won’t give you a full list of URLs, so copy these down and start working on your most valuable pages (i.e. the ones with the most traffic/conversions).
Step 3: Test your pages in PageSpeed Insights
There’s a handy link to PageSpeed Insights directly in the GSC report, so click that and wait for it to load.
Switch to the relevant tab (desktop or mobile), and view your results.
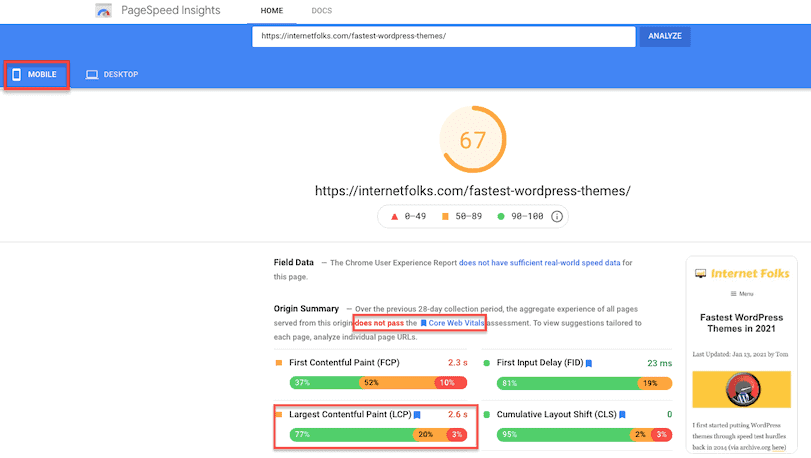
You’ll get confirmation that your page does not pass the Core Web Vitals assessment.
Scroll down to the “Opportunities” section and you’ll see a list of optimizations you could make.
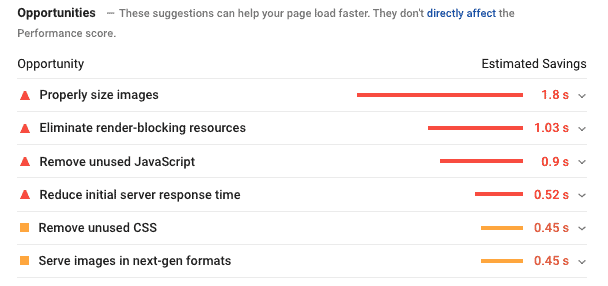
The most likely cause of a slow LCP score is large images. Click the “properly size images” tab and you’ll get a list of images by size that could be compressed.
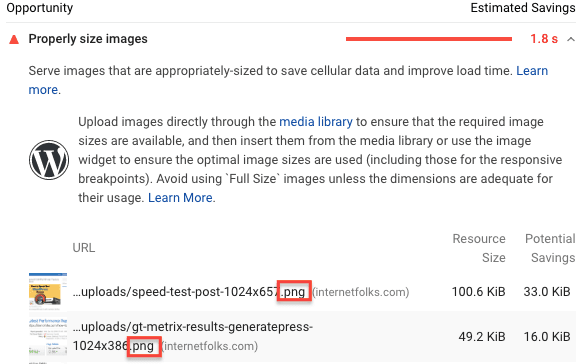
If your images are large or in PNG or JPEG format, there’s a simple fix: compressing and converting images to the faster-loading WebP format.
Step 4: Compress and convert images to WebP
I recommend reading my guide on how to use WebP images on WordPress, but essentially WebP is an image format Google created in 2010 that has better compression and smaller file sizes than older formats like JPEG and PNG.
WordPress version 5.8 or later allows you to upload WebP images, but, since not all browsers support WebP, it’s a good idea to convert images to WebP using a plugin so there is a JPEG or PNG fallback if necessary.
I use ShortPixel, because it handles both WebP converison and image compression automatically. It’s free and will compress 100 images/month. You can buy cheap PAYG credits (from $9.99 for 10k images) that never expire if you have a lot of images to update all at once.
Once you’ve installed ShortPixel, create an account and add the API key to sync it up. Go to Dashboard > Settings > ShortPixel > Advanced and check the option to “Also create WebP versions of the images”. This feature will use 1 credit per image.
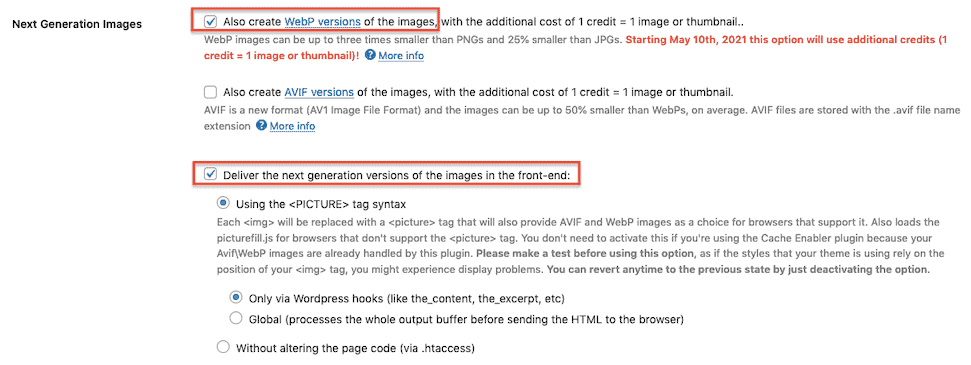
Next, check the option to “Deliver the next generation versions of the images in the front-end”. I’m using the <PICTURE> option, via WordPress hooks.
Since not all browsers support WebP, ShortPixel is a useful tool because it compresses the original JPEG and PNG images and will serve those on browsers that don’t use WebP.
If you don’t want use ShortPixel, you can also convert your existing WordPress media library to WebP using the WebP Express plugin (free) or WebP Converter for Media plugin (free).
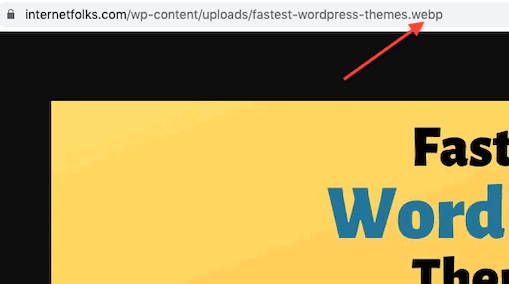
You can test that your images are now in WebP format by visiting a page on your website and right-clicking the mouse on any image. Click “Open image in new tab” and look at the image file name in the address bar. The file type at the end will tell you if it’s a JPEG, PNG, WEBP or other.
Step 5: Re-test your pages in PageSpeed Insights
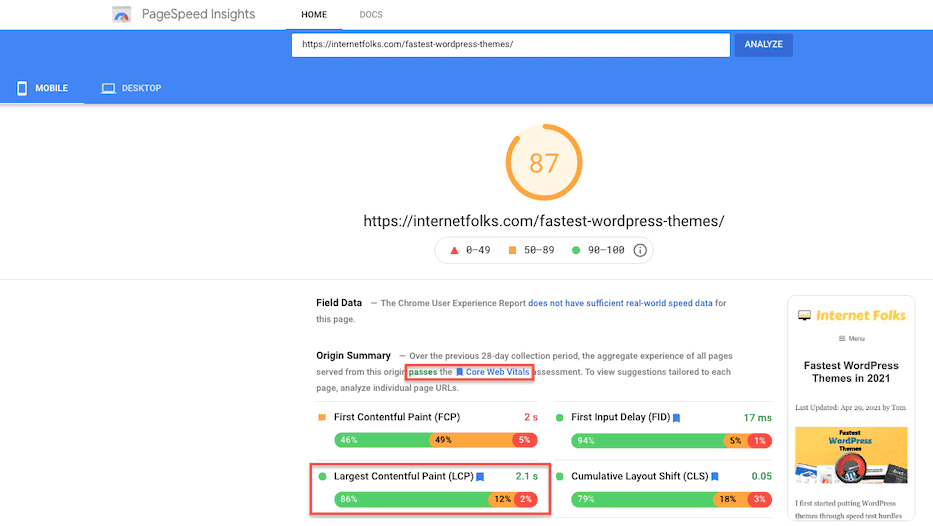
Delete any caches and stick your URL back into PageSpeed Insights. You should see an improvement – in my case, the LCP time went down to 2.1 seconds, which now passes the Core Web Vitals assessment. Nice!
Step 6: Validate fix in Search Console

Once you’re sure your pages are loading quickly enough, go back into the Core Web Vitals report in GSC and click the “Validate Fix” button. This lets Google now that the slow LCP issue is fixed. If you don’t see this feature, it’s fine – Google will continue to monitor Core Web Vitals metrics and update your GSC scores.
Why do my Core Web Vitals scores keep changing?
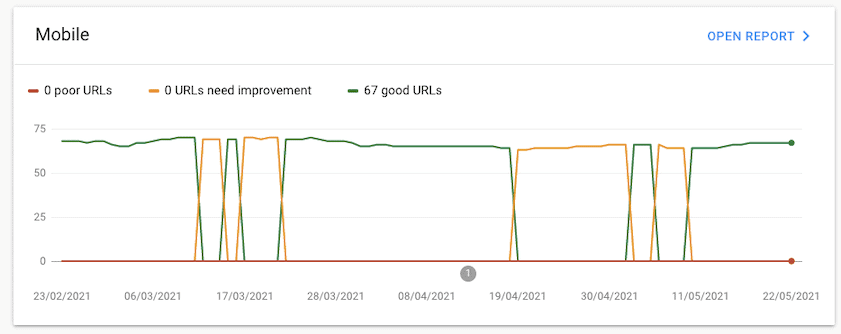
You might notice, via the GSC Core Web Vitals report, that pages bounce between “good” and “needs improvement”, or “needs improvement” and “poor”. This happens when your pages are borderline. Remember that Google’s data comes from real Chrome users who visit your site: an influx of visitors on slow network speeds can make your page appear slower to load. It’s also possible that your hosting server has variable performance, or your site is loading external scripts at variable speeds.
Ultimately, a changing Core Web Vitals score means you need to speed up WordPress to avoid dropping into the “needs improvement” or “poor” grades.

