WebP is a new image format that can make your image files smaller and faster loading and help your WordPress website load quicker. We all know that faster websites are good for SEO and UX and help us keep visitors and search engines happy.
This guide will help you learn about WebP, and how to correctly use it on your WordPress website.
I’ll cover ways to use WebP both with and without plugins, so you can choose your preferred solution.
Let’s get into it.
Table of Contents
What is WebP?

WebP is a next-gen, open source image format with better compression and smaller file sizes than older image types like JPEG and PNG.
WebP was created by Google in 2010 after the company acquired On2 Technologies. WebP supports animation, making it a viable GIF alternative, transparency, color profiles and metadata.
For more information, see the WebP FAQs.
Why use WebP?

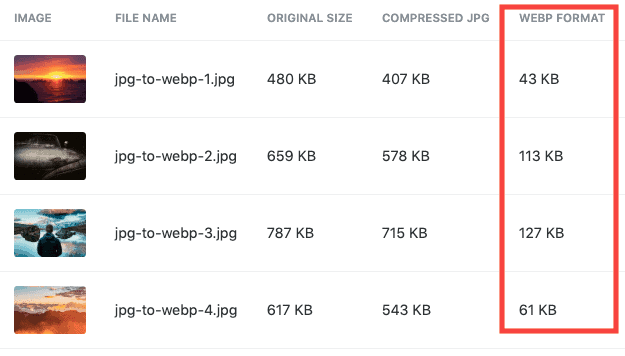
WebP images help keep the size of your website pages small. Smaller files load quicker, therefore using WebP images can help your website load quicker.
Speeding up WordPress is very important for helping improve SEO, UX and using WebP is a small and easy step toward making your WordPress website faster.
How to convert WordPress images to WebP format
If you have an existing WordPress website and want to use WebP, you’ll need to convert all your existing media library into WebP.
Luckily, there are free and premium plugins that help make the WebP conversion process very easy.
1. Check what image file types you are currently using
You can do this in 2 ways:
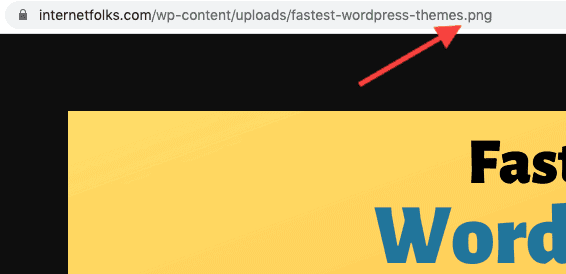
- Visit your website from a browser like Chrome, and right-click the mouse over any image. Click “Open image in new tab” and look at the image file name in the address bar. The file type at the end will tell you if it’s a JPEG, PNG, WEBP or other.

- Or, go to Dashboard > Media > Library and click on any image. You will see the file type listed on the right.

2. [WITH plugin] Install a WebP Plugin
I recommend using ShortPixel to convert your WordPress images to WebP for a couple of reasons:
- It can keep a backup of the original files so you can switch back if required
- Works in the background to automatically convert newly uploaded images to WebP
- Will convert old images to WebP automatically
- Also compresses images to lower size and improve loading times
- WebP conversion is free and does not use up image credits
ShortPixel is free for 100 images a month. If you have a large media library or upload a lot of content, you can buy extra image credits cheaply (they don’t expire and you can use them on as many domains as you like).
Once you’ve installed ShortPixel, create an account and add the API key to sync it up. Go to Dashboard > Settings > ShortPixel > Advanced and check the option to “Also create WebP versions of the images, for free”.

Next, check the option to “Deliver the WebP version of the images in the front-end”.
You have 2 ways of serving WebP images in ShortPixel:
- Using the <PICTURE> tag syntax
- Via .htaccess
I’m using the <PICTURE> option, via Global output.
Since not all browsers support WebP, ShortPixel is a useful tool because it compresses the original JPEG and PNG images and will serve those on browsers that don’t use WebP.
If you don’t want use ShortPixel, you can also convert your existing WordPress media library to WebP using the WebP Express plugin (free) or WebP Converter for Media plugin (free).
3. [WITHOUT plugin] Use CloudFlare to serve WebP images

If you use CloudFlare, a global CDN (content delivery network), you can check a simple option to serve images in WebP format if you’re on the Pro or higher account (paid). You’ll find the WebP setting under Speed > Optimization > Polish.
If you’re not currently using CloudFlare, I recommend you consider it. It’s free for basic features and can help speed up your website by serving it from different global location, while also reducing how much work your hosting server needs to do.
4. [WITHOUT plugin] Use a CDN to serve WebP images
Most CDNs will let you serve images in WebP format. The following CDN services have support for WebP image delivery:
- KeyCDN
- StackPath (formerly Max CDN)
- Fastly
- Amazon CloudFront
5. Verify if images are loading in WebP
Once you’ve finished converting your media library images into WebP format, delete any caches and use an incognito browser window to test if WebP images are loading correctly.
On Chrome, right-click the mouse over any image and click “Open image in new tab”. Look at the image file name in the address bar and check that it ends in “.webp”.

How to upload WebP images to WordPress
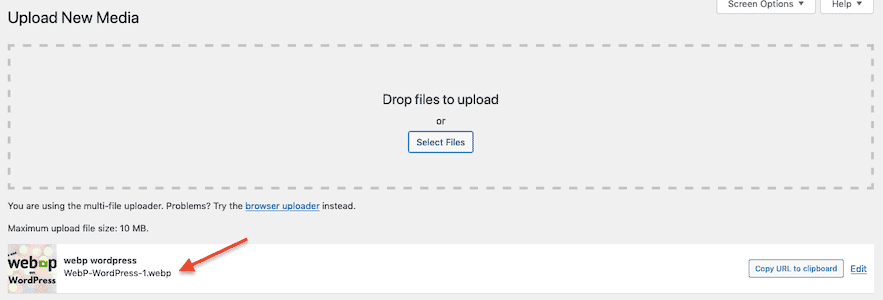
If your site uses WordPress version 5.8 or later, you can now upload WebP images directly to your media library.

Note: Until all browsers display WebP images, it’s a good idea to carry on using other image formats like JPEG and PNG, but serving smaller WebP files where possible. If you upload WebP images directly to WordPress, they may not display correctly on all devices and browsers.
WordPress WebP FAQs
How does WebP work?
WebP works differently depending on whether you’re using lossy or lossless compression.
Lossy WebP compression uses predictive coding, using the values in neighboring pixel blocks to predict values and encode the difference.
According to Google:
Lossless WebP compression uses already seen image fragments in order to exactly reconstruct new pixels. It can also use a local palette if no interesting match is found.
Which is the best WebP plugin for WordPress?
The two most popular dedicated WebP conversion plugins for WordPress are WebP Express and WebP Converter for Media.
The best image compression plugins with WebP support that I’ve tested are ShortPixel and Smush.
Does WebP reduce image quality?
Lossless WebP images maintain the original image quality. Lossy WebP images will result in reduced image quality, although it’s unlikely to be noticeable in most cases.
If your website images need to be high resolution or viewed large on a retina display, you need to check that WebP compression is not negatively affecting your image quality.
You can view a sample of WebP-lossless and WebP-lossy images in Google’s WebP gallery.
Which browsers support WebP?
WebP is natively supported by most popular browsers, including Chrome, Firefox, Microsoft Edge and Opera, on desktop and Android. Here’s the full list of all WebP supported browsers.
WebP is not supported universally by all browsers. For this reason, it’s recommended that you use WebP images with a JPEG/PNG as a fallback.
When will WebP work on Safari?
Apple has now added WebP support to Safari and iOS with the release of iOS 14 and macOS Big Sur. Users with old versions of Safari may still not be able to render WebP images.
Can I switch from WebP back to JPEG?
If you use a WordPress plugin like ShortPixel to serve WebP images and keep the originals, you can switch back to JPEG or the original image format at any time.
It is also a good idea to host both WebP and JPEG images as not all website browsers (like many older versions) support the WebP format.
Is using WebP good for SEO?
Google have not officially stated that using WebP images will improve SEO and rankings. However, Google developed the WebP technology, and they also recommend serving WebP and other compressed images to allow for faster website access.
If you use PageSpeed Insights to check how your web pages perform, you’ll see that Google recommends using WebP and a WordPress plugin to convert your images to WebP:

WebP can help your website load faster, and therefore it is good for SEO. Google has confirmed that it will roll out an official website speed ranking factor called Core Web Vitals in the near future.
Do WebP images allow metadata?
Yes, WebP images can have metadata stored in EXIF or XMP formats.
What software converts JPEG and PNG to WebP?
Google has created a WebP converter tool that can be downloaded for Linux, Windows and macOS. You can also convert images to WebP using command line.
Can I upload WebP images to WordPress?
Yes, if you are using WordPress 5.8 or later, you can upload WebP images directly to WordPress.

