WordPress is so flexible and easy to customize, but sometimes the best theme you picked when you were getting started is no longer the best in 2021.
That’s certainly been the case for me.
I’ve used WordPress for many years now, and have been through many, many theme changes over that time. I most recently switched my sites over to GeneratePress, and jotted down this helpful guide along the way.
Changing your WordPress theme is very easy and beginner-friendly, but there are a few key things you need to remember to switch from your old theme, especially if you are using it for SEO or adding Google Analytics code.
Here’s how to make the switch to GeneratePress without losing any content in 5 easy steps.
Note: If you’re on the fence about making the switch,have a quick browse of these GeneratePress Examples and GeneratePress Premium examples to get an idea of how your site could look and perform after moving themes.
Step 1: Backup your WordPress Website
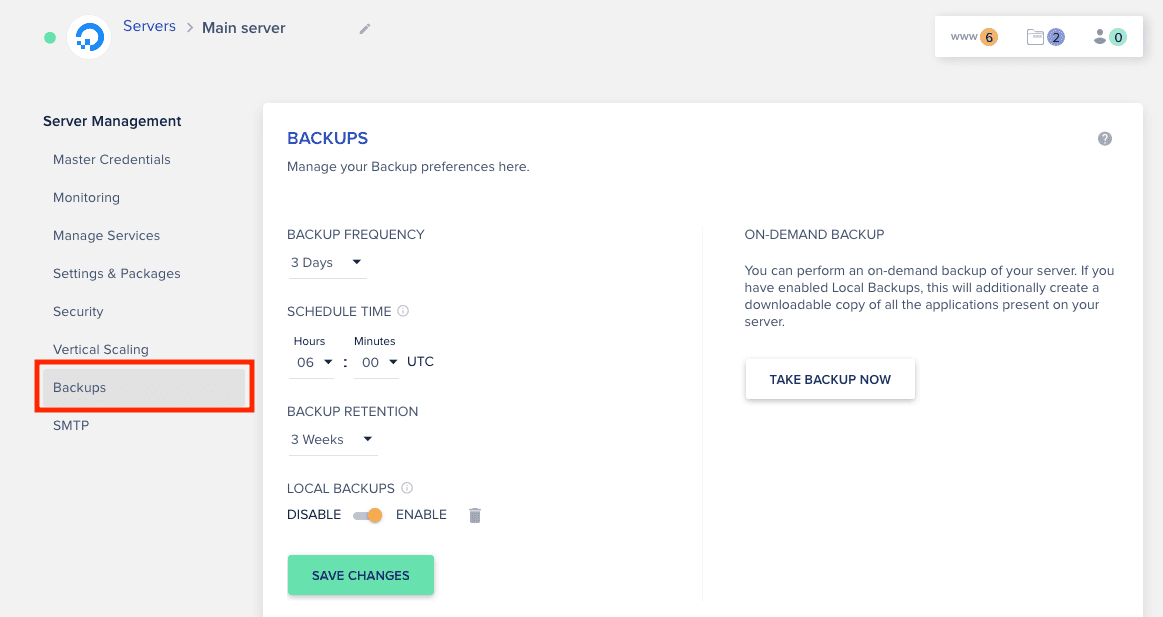
Before you even think about making changes, do a full backup of your entire WordPress website, including the database structure. It might seem like a chore, but it’s worth taking a few minutes to backup your site so you can scroll back to an earlier version if you mess something up.
Most good WordPress hosting providers will let you do an on-demand or automated backup of you site. If you don’t have hosting backups (consider switching hosts!), a free backup plugin like UpdraftPlus should do the trick.
As I use Cloudways to host this website (see my review here), I already have regular backups setup and I can click to take a backup now before moving on to step 2.
Optional: Create a Staging Site
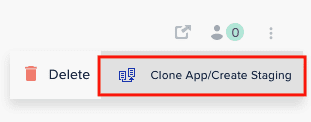
I recommend you make theme customizations on a staging clone of your WordPress website so that you don’t disturb your current visitors while you fiddle about with theme changes. That way, you can make changes to the staging site, make sure everything is looking good and then push them over to the live site when you’ve tested everything works.
Check if your WordPress host offers a staging option (I know Cloudways, my host, does. Yes, I am bragging!).
Step 2: Download and Install GeneratePress WordPress Theme
If you’re moving to GeneratePress Premium (and I recommend that you do), then you’ll need to buy it and download it before getting started. A 1-year license costs $59, or $249 for lifetime. I went for the lifetime license as I prefer not to bother with renewals and it’s better value in the long-term.
GeneratePress Premium comes with a lot more customization features than the free version, like custom colors and layout, and an importable site library.
The free version of GeneratePress is available for installation via the WordPress dashboard, and you’ll need to use it even if you’ve got the premium upgrade (which is actually a plugin, not a theme).
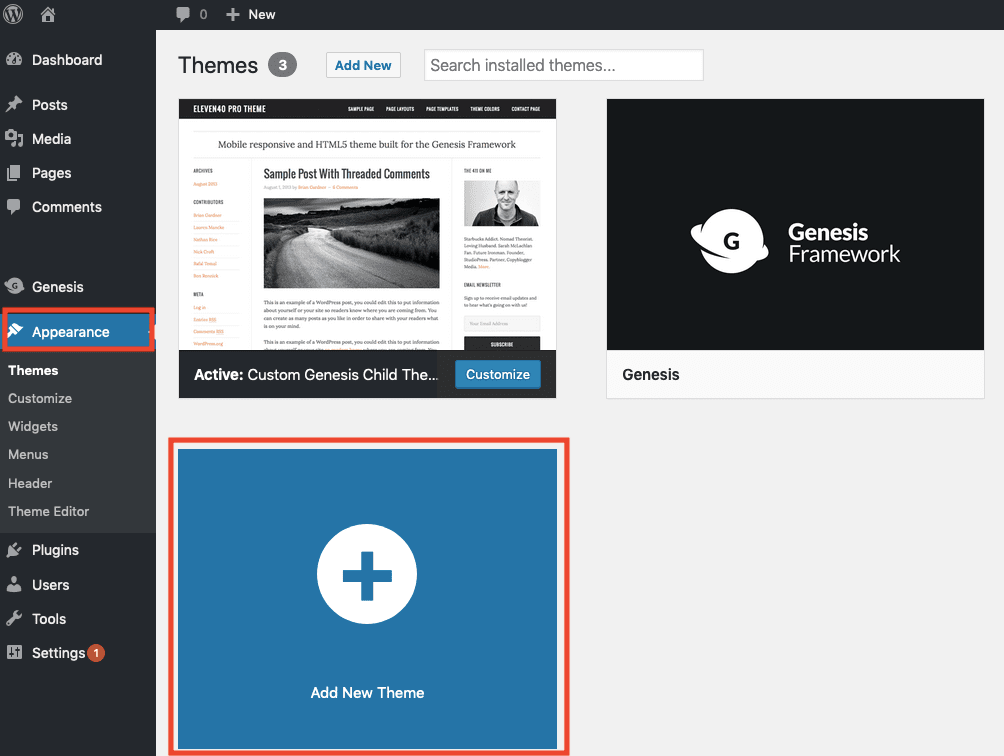
In your WordPress dashboard, go to Appearance > Add New Theme and type “GeneratePress” in the top-right search bar. You’ll see the GeneratePress theme appear – click “Install” to install.
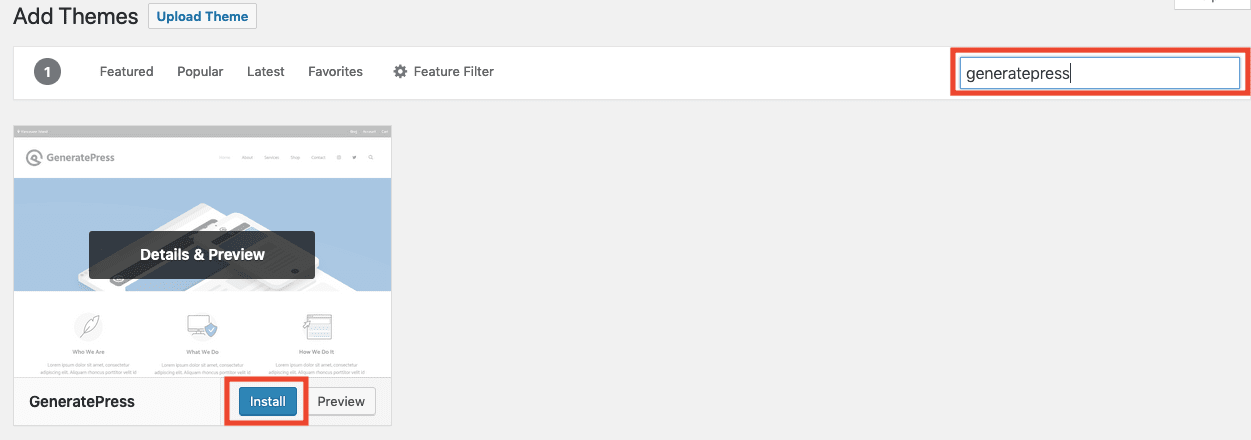
Don’t activate it just yet!
For premium users, it’s time to also install the premium add on.
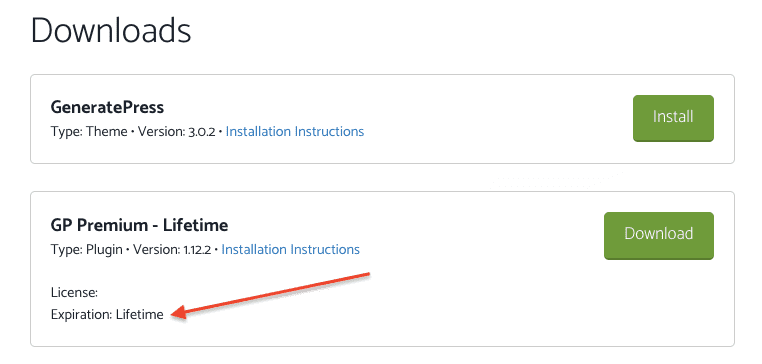
Download GeneratePress Premium by clicking “Download” in your GeneratePress account dashboard. Also make a note of your license key – you’ll need to enter the license number from the WordPress dashboard to activate GeneratePress Premium and get automatic updates.
To install GeneratePress Premium, you need to upload it as a WordPress plugin. That’s right, it’s a plugin not a theme!
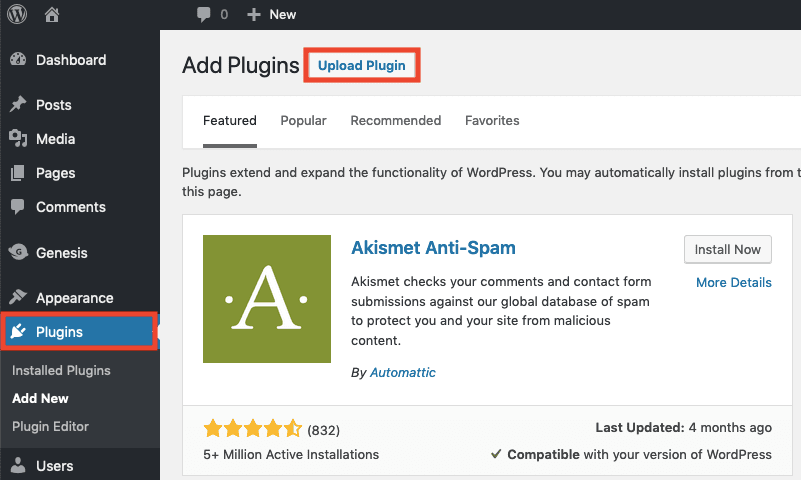
From your WordPress Dashboard, go to Plugins > Add New and click the button to “Upload Plugin”.
Select and upload the zipped folder you downloaded from the GeneratePress website. It should be called something like gp-premium-1.8.3.zip (the number denotes the latest version, so yours may differ).
Don’t activate the plugin just yet!
Step 3: Check the Settings of your Current Theme
This is the most important step, and the one that most people will probably overlook.
The goal of this step is to check what site functionality we’re currently using our existing theme for. I’ll show you what that looks like on one of my sites.
I’m switching a site from a custom Genesis Child Theme (from StudioPress) to GeneratePress. The Genesis theme has some built-in SEO functionality – if I move to a new theme, I’ll lose all my Genesis SEO settings – not good!
I recommend using an SEO plugin like SEOPress instead of doing SEO in a theme to avoid this problem, but anyway, the general principle here is to make a note of everything your current theme is doing for you, for example:
- Did you make custom changes to CSS or the functions.php file?
- Are you using your theme settings for SEO features (e.g. sitemap, meta titles and descriptions)
- How is your theme setup? (breadcrumbs, custom fonts, custom colors etc)
- Are you using your theme to add Google Analytics or other tracking code?
Jot these setting down (copy/paste any code you want to switch to the new theme).
If you are using custom code, I recommend adding it via a plugin like Code Snippets (it’s free). That way, your code will be around if you move or update themes in the future.
You don’t need to worry too much about forgetting something, because if you keep the old theme installed it’s easy to switch back if you’ve missed something.
Step 4: Activate GeneratePress via the WordPress Dashboard
Since you already installed GeneratePress as a free theme and (optional) premium plugin in Step 2, now it’s time to hit activate!
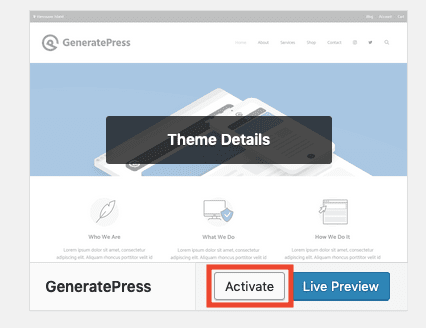
In your WordPress dashboard, go to Appearance > Themes and click “Activate” on the GeneratePress theme.

For premium users, also go to Plugins > Installed Plugins and click “Activate” on the GP Premium plugin.
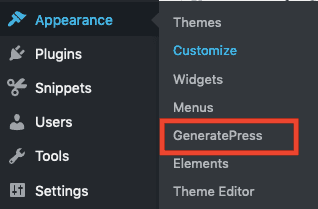
Don’t forget to add your license key, go to Appearance > GeneratePress and enter the license key in the “Updates” section.
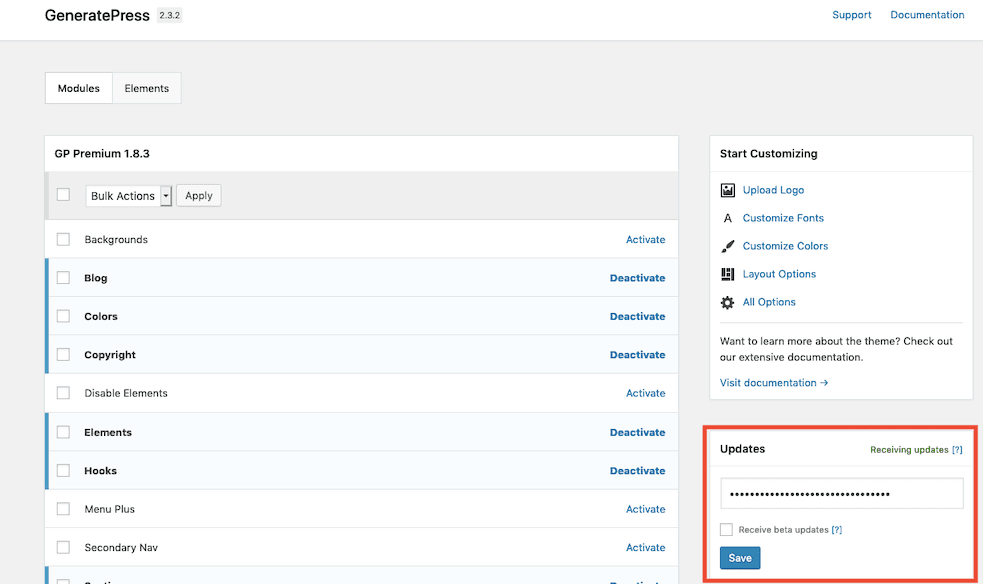
You’ll also need to activate all the premium modules you want to use – there’s a seperate module for each function, like Colors, Copyright, Blog. Simply select the ones you need and hit “Activate”.
Step 5: Customize GeneratePress Settings
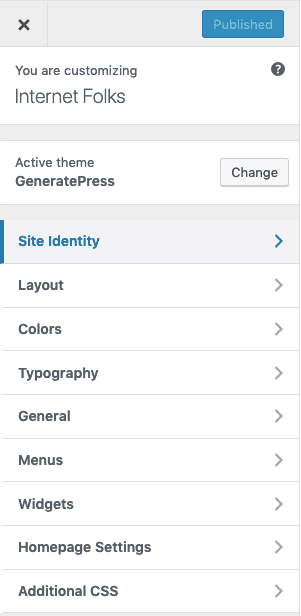
Now it’s time to make GeneratePress look awesome. Go to Appearance > Customize to open to make changes to the theme. You’ll be able to see a live update of changes on the right.
If you are a premium customer, you can use the GeneratePress Site Library to import a pre-designed setup, but do not install the demo content (this is meant for new sites, not existing ones). Installing the Site Library options for any design shouldn’t cause you any problems, but I still suggest you do it on a staging site if possible.
To make it easier, here are some things you’ll almost definitely need to change:
- re-add your logo into the GeneratePress customize panel
- modify the footer text
- change the custom colors, fonts and layouts
Free users will only have very limited customization options.
Don’t forget to add any tracking code or custom CSS changes from your old theme. GeneratePress has a handy custom CSS section, but I recommend adding extra PHP or tracking code to a plugin using a plugin like Code Snippets, because you can then keep GeneratePress updated without losing any custom code.
Finishing up
Check for anything else, like if you were blocking comments in your previous theme, or using any other custom functionality. It won’t take long to get everything ready in GeneratePress, and you can always follow their very helpful setup guide if you get stuck.
Your shiny new GeneratePress theme should now be all good and ready to go.
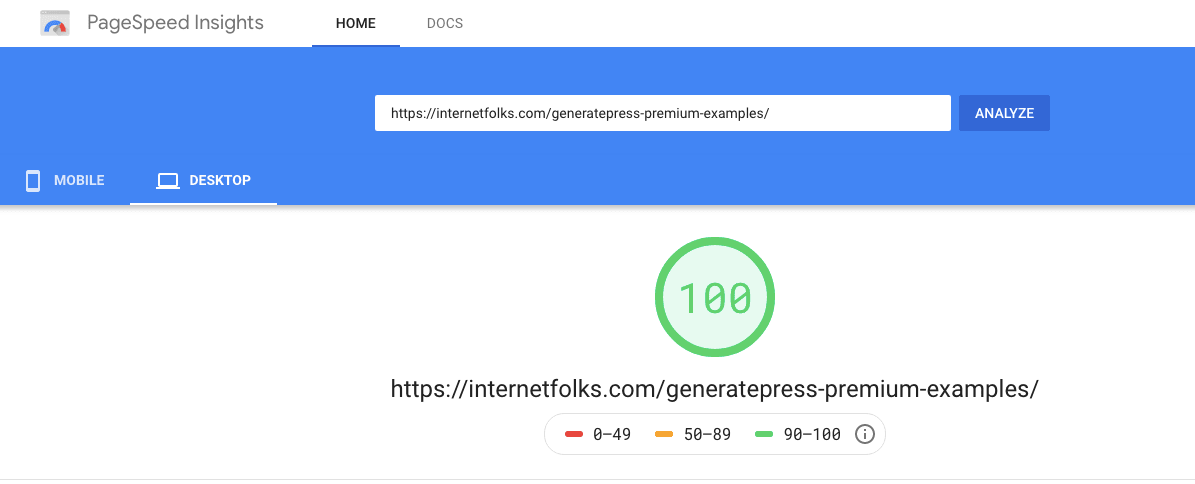
Bonus tip: Try running a website speed test before and after you change theme – you might be surprised by how much faster WordPress can be with the GeneratePress theme!
